Playlists
Build the ordered list of images and videos a surface plays, and choose which playlist you are editing.
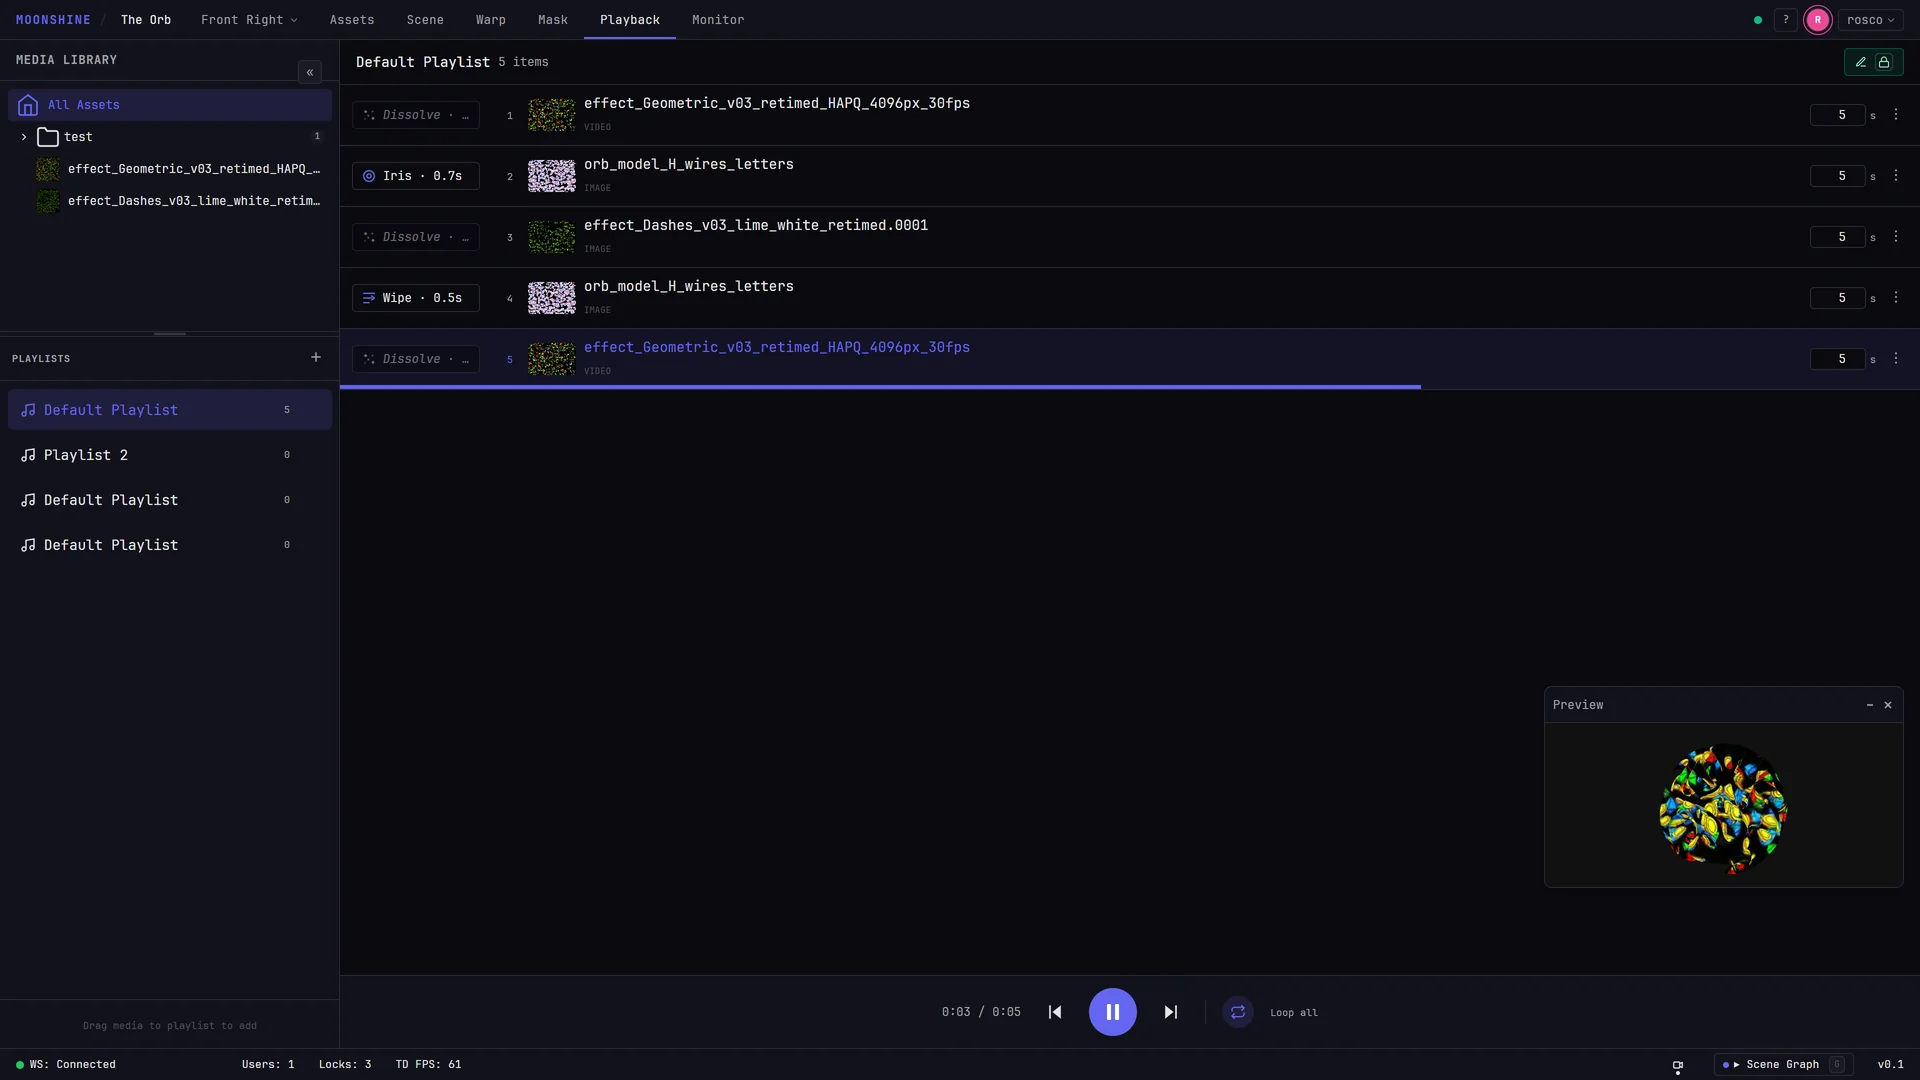
Open the Playback tab. The sidebar on the left has two panes — Asset Browser on top, Playlists underneath — and the center pane shows the playlist you currently have selected. Drag the divider between the two sidebar panes to give one of them more room; the split is remembered on this device.
Create a playlist
- In the Playlists header, click the + button (New Playlist).
- The playlist is added to the bottom of the list, named
Playlist N— one higher than the number of playlists already there.
Rename it right away if the number does not mean anything to you; the name is what you will be picking from in the scene graph later.
If you open the Playback tab in a project that has no playlists at all, Moonshine creates one called Default Playlist for you, so there is always something to drop media into.
Choose which playlist you are editing
Click a playlist row. It highlights, and the center pane switches to it. The small number at the right of each row is that playlist's item count.
Your selection is local
Which playlist you have open is a per-browser choice — another operator on the same show can be editing a different one at the same time. What is actually playing is shared by everyone. See Transport controls.
Rename
Double-click the playlist name, or right-click the row and choose Rename. Type the new name and press Enter to confirm, or Esc to leave it unchanged.
Delete
Hover a playlist row and click the trash icon, or right-click the row and choose Delete. A confirmation appears — deleting a playlist cannot be undone.
Deleting is only offered when the project has more than one playlist, so you can never end up with none.
Add media to a playlist
The Asset Browser in this tab lists only the images and videos in the project; other kinds of files, such as 3D models, are filtered out here. Upload media first if the browser is empty — see Uploading media.
- Drag a file from the Asset Browser onto the playlist to append it.
- Drag a folder to append every image and video sitting directly in that folder. Files in its subfolders are not included.
While you drag over the playlist, a dashed drop outline appears. An empty playlist reads No items in playlist / Drag media from the sidebar to add until you do.
New items are always appended to the end of the list. Adding the same file twice is fine — each row is its own item, with its own length and its own transition.
Reorder items
Drag a row up or down to move it. The highlight follows the item that is currently playing, so reordering during a show does not jump the output to a different clip.
Set how long each item stays up
Every row has a length box, in seconds, near the right edge. Click it and type a new value, or use its arrows to step in whole seconds.
| Default for new items | 60 seconds |
| Lowest value the box steps to | 1 second |
The length is what drives the playlist forward: when an item's length elapses, the playlist moves to the next item and plays the transition assigned to it. This applies to videos too — the item length, not the clip's own duration, decides when the change happens. A three-minute clip in a 60-second slot is cut off after a minute, so set the length to match the clip you want to see.
Editing a length while the playlist is running takes effect immediately — you do not have to stop and restart it.
Remove an item
Click the ⋮ button at the right of the row and choose Remove.
Loop modes
The loop button sits at the right end of the transport bar beneath the playlist, with the current mode named next to it. Each click steps to the next mode:
| Label | What it does |
|---|---|
| No loop | Plays through the list once and stops at the end. Next does nothing on the last item; Previous stops at the first. |
| Loop all | Restarts the whole list after the last item. Next on the last item wraps to the first, Previous on the first wraps to the last. |
| Loop one | Repeats the current item indefinitely. Next and Previous stay on it. |
The mode belongs to the playlist, so it is shared with everyone on the show and stored with the project.
When someone else is editing
The Playback tab is a shared, lockable area. If another operator is editing playback, the playlist controls go read-only for you and a lock indicator appears in the panel header. See Locks.
Next steps
- Transport controls — start playback, and connect a playlist to a surface so it actually reaches a projector.
- Transitions — choose how each item arrives on screen.
- Putting media on a surface — the wiring side of the same job.