3D surface warping
Pull the surface model itself until it sits on the real object, and every projector lighting it agrees at once.
This is the tool for object mapping — a built set, a car, a sculpture, a stage element that never quite matches the drawing. You work in the 3D viewport on the Scene tab, in two stages: choose the points you want to move, then move them.
The three viewport modes
The mode switch sits in the top-left corner of the viewport, next to the display switch (UV, Projection, Lux and Solid).
| Mode | Key | What it is for | Vertices shown |
|---|---|---|---|
| Object | V | Moving whole things — surfaces, projectors — with the transform gizmo | None |
| Select | E | Choosing which points of the surface you are going to pull, and how far each pull reaches | All |
| Warp | W | Actually moving those points | Only the selected ones |
Camera control is the same in all three: left-drag orbits, right-drag pans and scroll zooms. F frames whatever is selected — a projector, a surface — or the whole model when nothing is; it needs the pointer over the viewport. P jumps to the selected projector's point of view and back.
Pick a projector first
Selection sets are stored per projector and per surface. Until a projector is selected the Select and Warp panels read Select a projector first. See Projectors.
Stage 1 — build a selection in Select mode
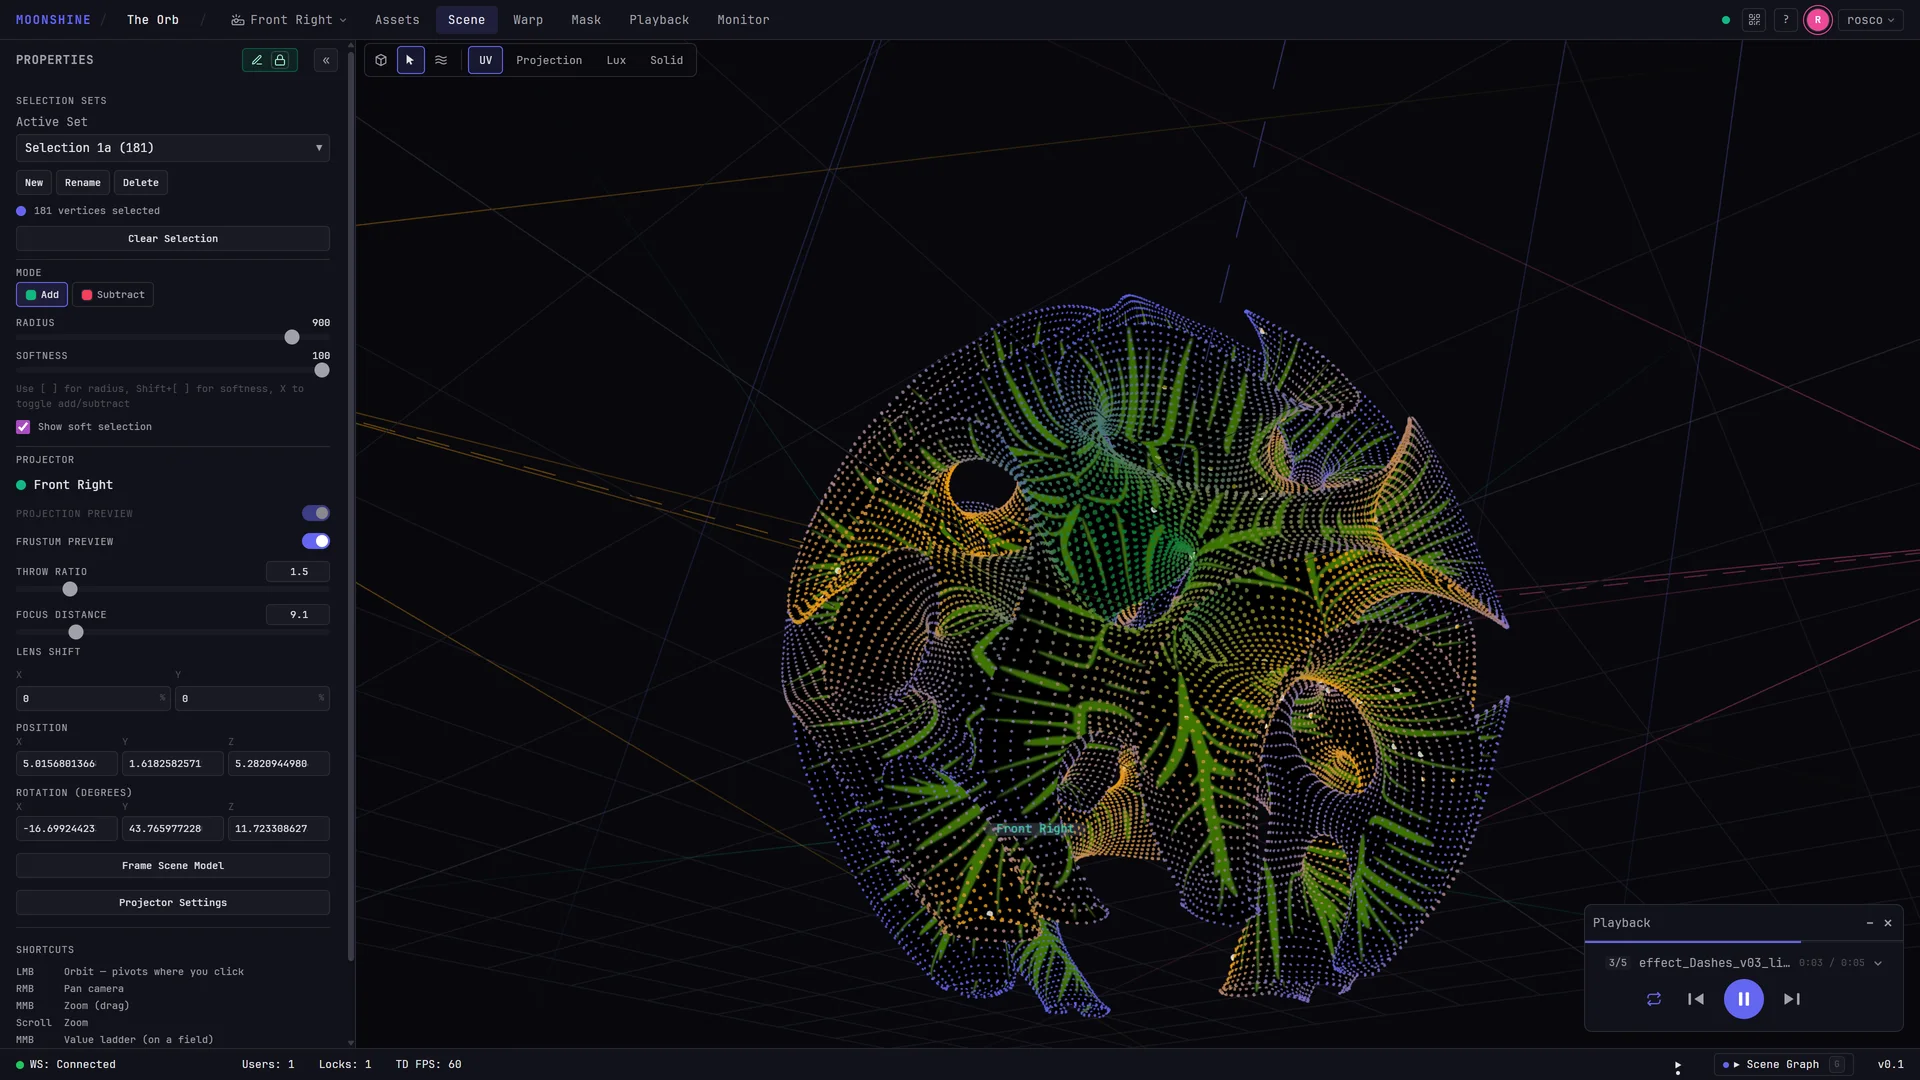
Press E. Every vertex of the surface appears as a point. Hovering one previews the brush: every point it would affect lights up green in Add mode, red in Subtract mode, so you can see the reach before you commit.
Click a point to add it to the active selection set. It becomes a large white center, and the points around it shade from indigo toward amber — the stronger the amber, the more of the move that point will take.
If no set exists yet, clicking creates one called Selection 1 automatically.
Radius and softness
Two sliders in the sidebar decide how far a pull will carry.
| Control | Range | What it does |
|---|---|---|
| Radius | 0 – 1000 | How far the influence reaches, in hundredths of a scene unit. The default, 50, is half a unit. 0 selects the single clicked point and nothing around it. |
| Softness | 0 – 100 | How much of that radius is feather. 0 moves everything inside the radius by the same amount, leaving a hard step at the rim. 100, the default, eases smoothly from full strength at the center down to nothing at the rim. |
Both settings are remembered between sessions, so the brush you finished with is the brush you start with.
Change them from the keyboard without leaving the viewport:
| Key | Action |
|---|---|
| [ / ] | Radius down / up |
| Shift+[ / Shift+] | Softness down / up |
| Alt + any of the above | The same, in steps a fifth the size |
| X | Toggle between Add and Subtract |
Radius and softness are frozen when you click
Each point remembers the radius and softness that were set at the moment you added it. Moving the sliders afterwards changes the next point you add — it does not re-shape the points already in the set. If a point's reach is wrong, subtract it and click again with the new settings.
That freezing is a feature, not a limitation: it lets one set hold a broad point for a gentle regional pull and a tight point for a hard local correction, and each keeps behaving the way you set it up.
Add and subtract
The Mode switch (green Add, red Subtract) decides what a click does. X toggles it.
- Add puts the clicked point into the set with the current radius and softness.
- Subtract works like an eraser: it removes every center within the current radius of your click, so you can wipe out a cluster in one pass. Drop the radius to 0 to remove exactly one.
Selection sets
A set is a named group of points with their reaches, saved with the project. Keep separate sets for the parts of the object you correct separately — a set for the roofline, a set for the door, a set for the base — and you can come back to any of them later without rebuilding it.
| Control | What it does |
|---|---|
| Active Set | Chooses which set you are editing. Each entry shows its name and point count. |
| New | Creates another set. It gets its own color, so overlapping sets stay tellable apart. |
| Rename | Edits the name in place — Enter saves, Esc cancels. |
| Delete | Removes the set entirely. |
| Clear Selection | Empties the active set but keeps it. It confirms first, naming the set and how many points it is about to drop. |
Rename and Delete appear once a set is active, and Clear Selection once that set has points in it. Under the buttons, a color dot and a count report the state of the active set.
Show soft selection toggles the amber influence halo. Turn it off when the halos of a dense set overlap so much that you cannot see the centers; the centers stay visible either way.
Stage 2 — move the points in Warp mode
Press W. All the unselected vertices disappear, leaving your selection centers.
- In the sidebar's Warp Settings, check Target Selection points at the set you want to work with. If the projector has no sets yet, the panel says so — go back to Select mode and build one.
- Click one of the remaining points. A three-axis gizmo appears on it: red for X, green for Y, blue for Z.
- Drag an arrow to move the point along that axis. The surface deforms as you drag, and anyone else looking at the same surface sees it move with you.
- Click another point to move the gizmo to it. Click empty space, or press Esc, to put the gizmo away.
| Key | Action |
|---|---|
| Left Right | Nudge the active point along X |
| Up Down | Nudge the active point along Y |
| Shift + any arrow | Nudge in steps a fifth the size |
| Esc | Put the gizmo away |
| Ctrl+Z / Ctrl+Shift+Z | Undo / redo your warp edits |
The keyboard covers X and Y only — for depth, drag the blue arrow.
Nudging is the right way to finish a correction: get close by dragging an axis, then step back to where you can see the object properly and drive the last of it from the keyboard.
What "soft" actually does
When you move a point, its neighbors come with it — in the same direction, scaled by how strongly each one is influenced.
- Inside the point's inner core, neighbors move the full distance, exactly like the center.
- Between the core and the outer radius, the movement eases off to nothing.
- Softness sets where the core ends: at 0 the core fills the whole radius (everything moves together, hard edge at the rim), at 100 there is no core at all (a smooth dome centered on the point).
- Outside the radius, nothing moves.
Two things are worth knowing. First, only the active point's radius and softness apply to a drag — the other centers in the set are just other handles waiting to be grabbed, not extra influence on this one. Second, a soft pull with a generous radius is almost always better than several hard pulls: it keeps the surface smooth, so content sliding across the correction does not visibly kink.
Working with other operators
Selecting and sculpting are collaborative. Several operators can build selections and pull on the same surface at the same time, and you will see their cursors and their edits live — nothing is locked out. Your Ctrl+Z takes back only your own edits, never a colleague's. See Editing a surface together.
Committing the result is different: Bake Warp and Revert to Source are exclusive, and are disabled while another operator holds the warp lock for that projector and surface. See Locks.
When you are happy with it
Sculpting is edit work; committing it is a separate, deliberate step. The same Warp Settings panel carries Bake Warp, Revert to Source and Reset Warp, and reports whether the surface has been baked since you last changed it. Read Baking and reverting next.