Brush masking
Paint a per-projector mask with the brush, and shape it with the size, hardness and opacity controls.
A mask records which parts of a projector's frame you want held back — the spill past the edge of a set piece, the doorway you must not blind, the strip where two projectors overlap and one of them has to give way. Every projector carries its own mask, painted at that projector's resolution, and it is stored with the project alongside that projector's other settings.
Open the mask editor
- Click Mask in the top bar. (Or press / to open the command palette and run Go to Mask.)
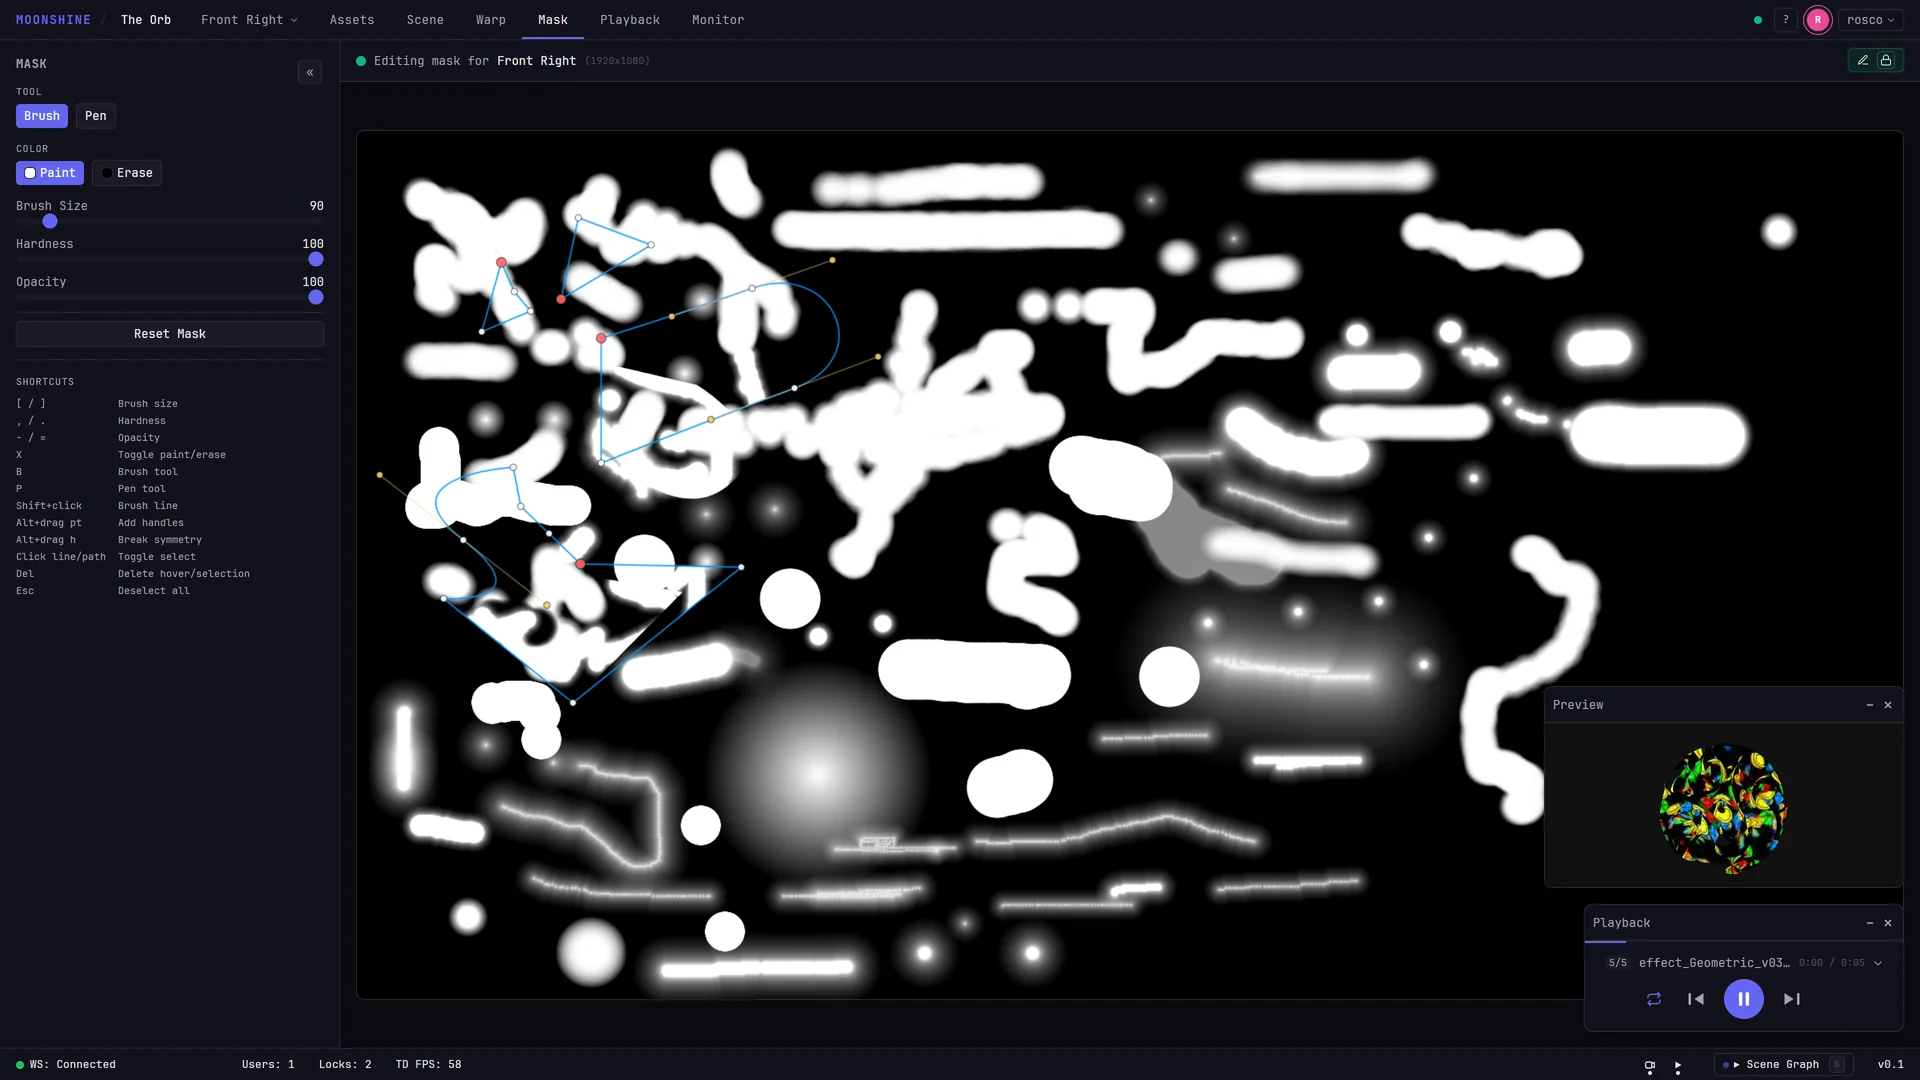
- Read the bar above the paint area. It says Editing mask for, then the projector's name and its resolution in pixels.
- To work on a different projector, choose it from the projector menu in the top bar, or press 1 to 9 to select by position in the list.
Switching projectors saves the mask you were editing and loads the next one, so you can work down a rig without doing anything else first.
There is a third way in: every projector in the scene graph has a Mask node under it. Clicking that node selects the projector and opens this tab in one move.
You are looking at the mask, not at the picture
The paint area shows the mask on its own, so it starts black and your painted coverage appears as white. It is letterboxed to the selected projector's aspect ratio, so what you paint sits in the same frame as that projector's output.
Move around the paint area
| Action | Result |
|---|---|
| Scroll wheel | Zoom, from 50% to 800%, centred on the pointer |
| Middle-mouse drag | Pan |
| Double-click the empty space around the frame | Reset to 100% |
| Reset button, bottom right | Reset to 100% |
The zoom percentage sits in the bottom-right corner of the paint area, and the Reset button appears next to it as soon as you are no longer at 100%. Zooming does not change the brush: the size you set is measured in the projector's pixels, so the ring under your pointer grows and shrinks with the zoom to show what you will actually paint.
Paint and erase
With Tool set to Brush, drag on the paint area to lay down mask coverage. Switch Color to Erase and drag again to take coverage away. Press X to flip between the two without leaving the paint area — the quickest way to work is to paint the rough shape, then erase back into it.
Tool and Color are the two segmented controls at the top of the Properties sidebar. If the sidebar is hidden, press \ to bring it back.
The brush controls
All of the brush settings live in the Properties sidebar, and each has a live shortcut that works while you are painting.
| Control | What it does | Range | Shortcut |
|---|---|---|---|
| Tool | Brush painting, or pen path editing | Brush / Pen | B / P |
| Color | Whether the brush adds coverage or removes it | Paint / Erase | X toggles |
| Brush Size | Brush diameter, in the projector's pixels | 1 – 1000 | [ / ] in steps of 5; { / } in steps of 1 |
| Hardness | How sharply the brush edge falls off | 0 – 100% | , softer / . harder, in steps of 10% |
| Opacity | How much coverage one stroke lays down | 0 – 100% | - / = in steps of 10% |
A new user starts on Brush, in Paint, at size 40, 50% hardness and 100% opacity. Whatever you change these to is remembered for you between sessions.
Hardness decides how abruptly your coverage stops at the edge of the brush. At 100% the brush is a solid disc with a crisp rim — right for cutting against a hard line such as a door frame, a screen edge or the corner of a set piece. At 0% the coverage fades from the centre of the brush all the way out to the rim, which is what you want when the edge has to fade out rather than end. Values in between narrow or widen that fade band.
Opacity below 100% lets you creep up on a value instead of committing to full coverage in one pass. Set it to 20–30% and each pass takes the area a little further, which is the practical way to build a gradient across a strip rather than a hard boundary.
One drag is one pass
Coverage does not build up within a single drag — scrubbing back and forth over the same spot without releasing the button gives the same result as one clean pass. To build up, release and drag again. That is what makes low-opacity work predictable.
Straight lines
Hold Shift and click to paint a straight line from the end of your last stroke to the point you clicked. Chain clicks to walk a straight edge across the frame — useful along an architectural line where a freehand drag would wobble. The line uses the current size, hardness, opacity and paint/erase setting.
The first click after you open the editor or switch projectors has no previous point to work from, so paint one ordinary stroke first.
Painting with a stylus
If you paint with a pen on a tablet, pressure scales the brush: light pressure gives a narrower stroke than the Brush Size setting, full pressure gives the size you set. A mouse or a finger always paints at full size.
Keeping paint inside a shape
You do not need a steady hand to get a clean edge. Draw a closed shape with the pen tool, leave it selected, and brush strokes are confined to the inside of that shape — you can drag straight across the boundary and nothing lands outside it. See Vector masks.
Undo
Ctrl+Z steps back through your painting, up to 50 strokes.
Undo in the mask editor applies to the tool you currently have selected: on Brush it takes back strokes, on Pen it takes back path edits. It is also separate from undo everywhere else in Moonshine, and it does not survive loading a mask. There is no redo here — Ctrl+Shift+Z does nothing in the Mask tab. Layers and undo covers what undo can and cannot recover.
Start over
Reset Mask, below the brush controls in the Properties sidebar, clears the whole mask for the selected projector. It asks first: the Reset Mask? dialog warns that it will clear all brush strokes and vector paths, and that the action cannot be undone. Choose Cancel to back out or Reset to go ahead.
Saving, and working alongside other operators
There is no save step. Your work is written to the show computer a moment after you stop painting, and again when you switch to another projector.
Opening the Mask tab takes the lock on that projector's mask, so nobody can paint over you. Anyone else who opens the same projector's mask sees your name and is editing in the bar above the paint area, with a Request access button; their controls stay dimmed and their pointer will not paint until you release it. See Locks.
The lock follows the projector rather than the tab, so moving to another tab keeps it. To hand it back, either select a different projector or click the padlock button in the bar above the paint area.
Where to go next
- Vector masks — the pen tool: precise shapes, curves, and using a shape as a stencil for the brush.
- Layers and undo — how painted coverage and paths combine, and the limits of mask undo.
- Projectors — a projector's resolution sets the size of its mask.
- Keyboard shortcuts — the full list, also available in the app from the ? menu.